Note: This install occured on a Mac mini. If you are using a Power PC based system, make sure you get the proper version of MySQL.
Important commands: hdiutil, installer, wget
Download
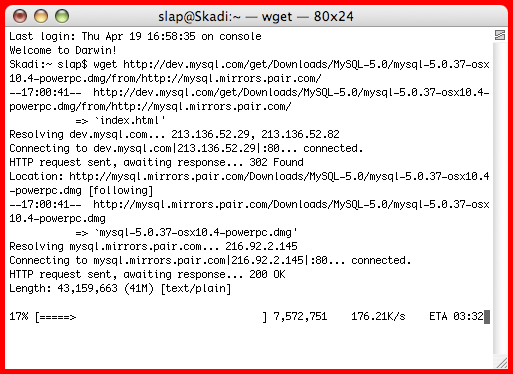 For some reason, MySQL's main page has become nearly unreadable. Therefore, you might find it easier to go straight to the MySQL downloads page. After navigating the myriad of pages necessary to make your final selection regarding which version and platform you will be installing on, you should finally end up on a page that starts the download. Copy the link to your clipboard and use Terminal and
 <acronym title="Secure Shell">ssh``</acronym> to log into the remote Mac. Use wget to download the <acronym title="Disk IMage">DMG</acronym>.
<!--more-->
Mount - Install - Detach
If you're familiar with installing software remotely in Mac OS X, you'll recognize the mantra: Mount - Install - Detach. You need to use hdiutil to mount the disk image, installer to install the packages (both the main package and the startup package), and then back to hdiutil to detach the disk image. Commands follow; remember the '\$' indicates the shell prompt.
$ sudo hdiutil mount mysql-5.0.37-osx10.4-i686.dmg
$ cd /Volumes/mysql-5.0.37-osx10.4-i686
$ sudo installer -pkg mysql-5.0.37-osx10.4-i686.pkg -target "/"
$ sudo installer -pkg MySQLStartupItem.pkg -target "/"
$ cd
$ sudo hdiutil detach /Volumes/mysql-5.0.37-osx10.4-i686/
Start Up
MySQLStartupItem.pkg installs in /Library/StartupItems/MySQLCOM. You can start the server manually by issuing sudo /Library/StartupItems/MySQLCOM/MySQLCOM start at the command prompt. To ensure that MySQL starts after a reboot, make sure that /etc/hostconfig contains the line MYSQLCOM=-YES-. If it doesn't, simply edit the file with your preferred text editor, Vim.
Set Passwords
The MySQL server is up and running, but it has 4 user accounts with empty passwords. The two anonymous accounts aren't necessary, so we'll remove them first.
$ cd /usr/local/mysql
$ bin/mysql -u root mysql
mysql> DELETE FROM user WHERE User = '';
mysql> FLUSH PRIVILEGES;
Don't exit the mysql client yet. There are three different ways to change the root password:
- UPDATE statement in the
mysqlclient - SET PASSWORD statement in the
mysqlclient mysqladminfrom the command-line
Since we're already in the mysql client, we'll go ahead and use the UPDATE statement to change both root passwords. Be sure to use a secure password for your root.
mysql> UPDATE user
    -> SET Password = PASSWORD('slaptijack')
    -> WHERE User = 'root';
Network?
By default, MySQL listens on port 3306 on all addresses of the server. If this MySQL installation is only going to be used locally, you'll probably want to disable remote access. You can do this with two ways by editing /etc/my.cnf and restarting the server. (If /etc/my.cnf doesn't exist, create it with sudo touch /etc/my.cnf.) Open /etc/my.cnf with your preferred editor and add one of the following:
[mysqld]
bind-address=127.0.0.1
or, to completely disable networking,
[mysqld]
skip-networking
Restart MySQL with sudo /Library/StartupItems/MySQLCOM/MySQLCOM restart and check your work with netstat -an | grep 3306. You should either go immediately to a shell prompt, or see output indicating port 3306 is bound to 127.0.0.1 (127.0.0.1.3306).
Ready For Work
Your MySQL installation should now be ready for real work. You'll need to go through the process of adding new users and databases as defined by your application.
Further Reading
- High Performance MySQL: Optimization, Backups, Replication, and More by Baron Schwartz, Peter Zaitsev, Vadim Tkachenko, Jeremy Zawodny, Arjen Lentz, and Derek Balling
- MySQL Stored Procedure Programming by Guy Harrison, Steven Feuerstein